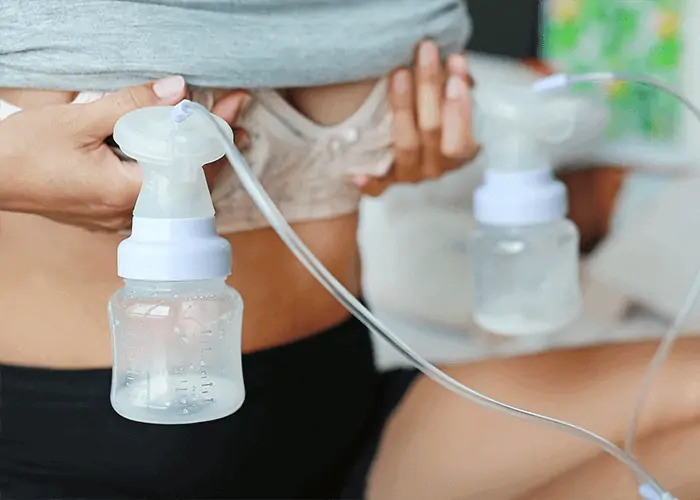
Building a breast milk stash does more than supply plenty of milk for your baby: It guards against emergencies, helps keep your milk supply strong, and helps you gain confidence in your breastfeeding journey.
“Don’t cry over spilled milk.” It’s an idiom that takes on a whole new meaning when you embark on a breastfeeding journey.
Because, let’s be real, we’ve all cried at least a little over spilled, spoiled, or wasted milk.
Having a breast milk stash, however, takes some of the anxiety out of spilled milk.
Whether you’re exclusively pumping or you’re pumping while you’re away from your baby or any other combo, there are lots of ways to build up a stash to meet your baby’s needs.
Exclusively pumping parents, you have a leg up on this. Since your routine already involves pumping, building a stash involves storing your extra milk. If you don’t make much extra, you can add extra pumping to your pumping routine.
It depends! Each parent-baby dyad is different, and everyone has different goals for their breastfeeding journey. How much milk would you feel comfortable having in reserve? How much time do you have to spend pumping? What are your baby’s needs? All these questions should factor into building your breast milk stash.
“Every parent has a different ideal amount she would like to store,” says Nest Collaborative IBCLC, Robin Williams. “Your main guide should be how and when you plan to use that milk for your baby.”
Are you building a breast milk stash before heading back to work? Planning is a good idea. You don’t want to pump so much that your body creates oversupply, which can lead to forceful letdowns, clogged ducts, and mastitis.
As a working parent, a good goal for your milk stash is 3-5 days (or 36 to 80 ounces) of milk in the freezer before starting back to work, although the amount ultimately depends on how long you’ll be away from your little one each day. This amount will give you some leeway on days when your baby eats more than expected or if you have less productive pump sessions.
Of course, you can always aim for a larger amount. But pumping can be stressful, and stress and milk production aren’t great friends.
If you’re not returning to work immediately and have been solely nursing, you may not have even touched your breast pump. No worries! Building a milk stash can be an excellent way to provide your partner and other caregivers with milk for feeds.
Unless you’re pumping for another reason—say, donating milk to the local milk bank—you just need enough milk to cover a few bottles for your baby. A good goal might be 15-30 ounces to start, keeping in mind that your baby will typically take 2-4 ounces for a feed. That means even a few ounces can be enough for a part-time pumper.
Building a stash takes time. Very few parents can pump out tens of ounces overnight. But that’s okay, too! As with many things, planning makes meeting your breastfeeding goals more manageable.
Depending on your timeline, most parents can build up a stash within a couple of weeks. This is assuming, though, that breastfeeding is going well and that you can pump several times a day. (If you’re not already exclusively pumping, that is.)
A word of caution, though: There’s no one-breast-pump-fits-all formula to building your milk stash. Each parent has a different breastfeeding relationship with their baby, milk supply, pump, work-life balance, etc.
“Think about what makes sense for your family. It may or may not match what worked for your friend, co-worker, blog poster, social media influencer, and so forth,” points out Nest Collaborative IBCLC, Robin Williams.
If you’re feeling overwhelmed by the process, get support. An IBCLC can help you develop a tailored plan for building a breast milk stash, and a breastfeeding support group can help you stay motivated.
You want to build a stash of breastmilk. You’ve got a couple of weeks to get it. Ready to get started?
Okay, we love the enthusiasm, but small and steady wins the race. You don’t want to get burned out on pumping a week into your plan. And trust us, that’s possible. So here are some tips for meeting your goals without stressing out about it.
Start with the fundamental question of how much your baby needs to consume each day. The American Academy of Pediatrics estimates that babies between 2-5 months of age will enjoy between 2-4 ounces per feeding. If your baby feeds every 2 hours, that means that you should aim to pump approximately 25 ounces each day.
Note: This number may vary, depending on whether you are also nursing your baby.
If you’re unsure of your baby’s needs and you’ve primarily had a nursing relationship, you can work with a lactation consultant on doing weighted feeds to see how much milk they transfer. However, that’s probably not necessary—you’ll get an idea within the first few bottle feedings of how much they need.
Schedules make pumping easier to manage logistically, but they also help your milk supply. Your milk supply is constantly adjusting, trying to predict how much milk your baby will need from day to day. If you give consistent instructions to make a certain amount of milk, your body will respond accordingly.
Your schedule will depend on your breastfeeding journey:
Remember, unless you are power-pumping, longer isn’t necessarily better. In fact, staying at the pump too long can lead to oversupply, nipple damage, clogged ducts, and pumping burnout.
“Pumping needs to work into the breastfeeding relationship with your baby,” shares Williams. “This isn’t a one size fits all thing. Customize your pumping to meet your family’s needs.”
Ideally, you should introduce a bottle between 4-6 weeks of age. At this point, you’ll have established your nursing relationship with your child and can add bottle feeding into your relationship without risking bottle preference.
You’ve heard of nipple preference and bottle preference, but what’s the difference between these two? Let’s look closer.
But parents, if you have to introduce a bottle earlier for whatever reason, please, don’t feel bad. We can’t predict what life will throw at us. If you’re finding yourself unexpectedly needing to pump and bottle feed your baby, take a deep breath. We know it’s stressful. It’s normal to be worried about how your baby will adapt. But trust us: they will adapt.
As you start bottle feeding your baby, make sure to practice paced bottle feeding.
Hydrate. Eat a balanced diet. Hydrate some more. Take your prenatal vitamin. Hydrate some more.
Also, sleep! We know it’s on your radar—all parents would like more sleep—but breastfeeding can be exhausting. Squeezing in a quick nap, going to bed 30 minutes earlier, it all adds up…and it all can help keep your milk supply going.
If you pump, you need to keep your pumping equipment clean. All of it. Very, very clean.
We’re not joking around. Breast milk is sweet, sticky, and can drip, spray, and leak all over the place. This makes your breast pump a haven for mold and bacteria.
To keep your breast milk safe, clean and dry your pump parts, bottles, and your pump after each pumping session. Enlist your partner to help out with these tasks to decrease some of your breastfeeding-related workloads.
Speaking of safety, you need a plan for storing your milk safely.
You’ll want to figure out where you are going to store your milk. You can safely keep breast milk in the fridge for up to 4 days. This is completely fine if you’re just pumping for a few bottles here and there, but if you’re building a stash, you’ll have more than you can handle in the fridge.
Lots of parents use a spare freezer for breast milk storage. An extra freezer can help with organizing and managing your milk stash.
If you do decide to store breast milk in your fridge, then make sure to follow these steps for safety:
You’ve built a stash of breast milk—congratulations! We know how much work that is.
Now the question is, how do you use it?
Your oldest milk should be first in line to use. When you pull your milk, label it with the date you removed it from the freezer. Pull the smallest amount of milk you think you’ll need. Remember, you can always defrost more.
To prep bottles, you can either defrost them in the fridge overnight or you can put them in cold water to thaw.
Figuring out how to handle your breast milk stash can be overwhelming. That’s why we’re here. If you’ve got questions about best practices for storing and handling your breast milk, let’s talk. Our IBCLCs can help you evaluate your options and figure out how to meet your goals.
